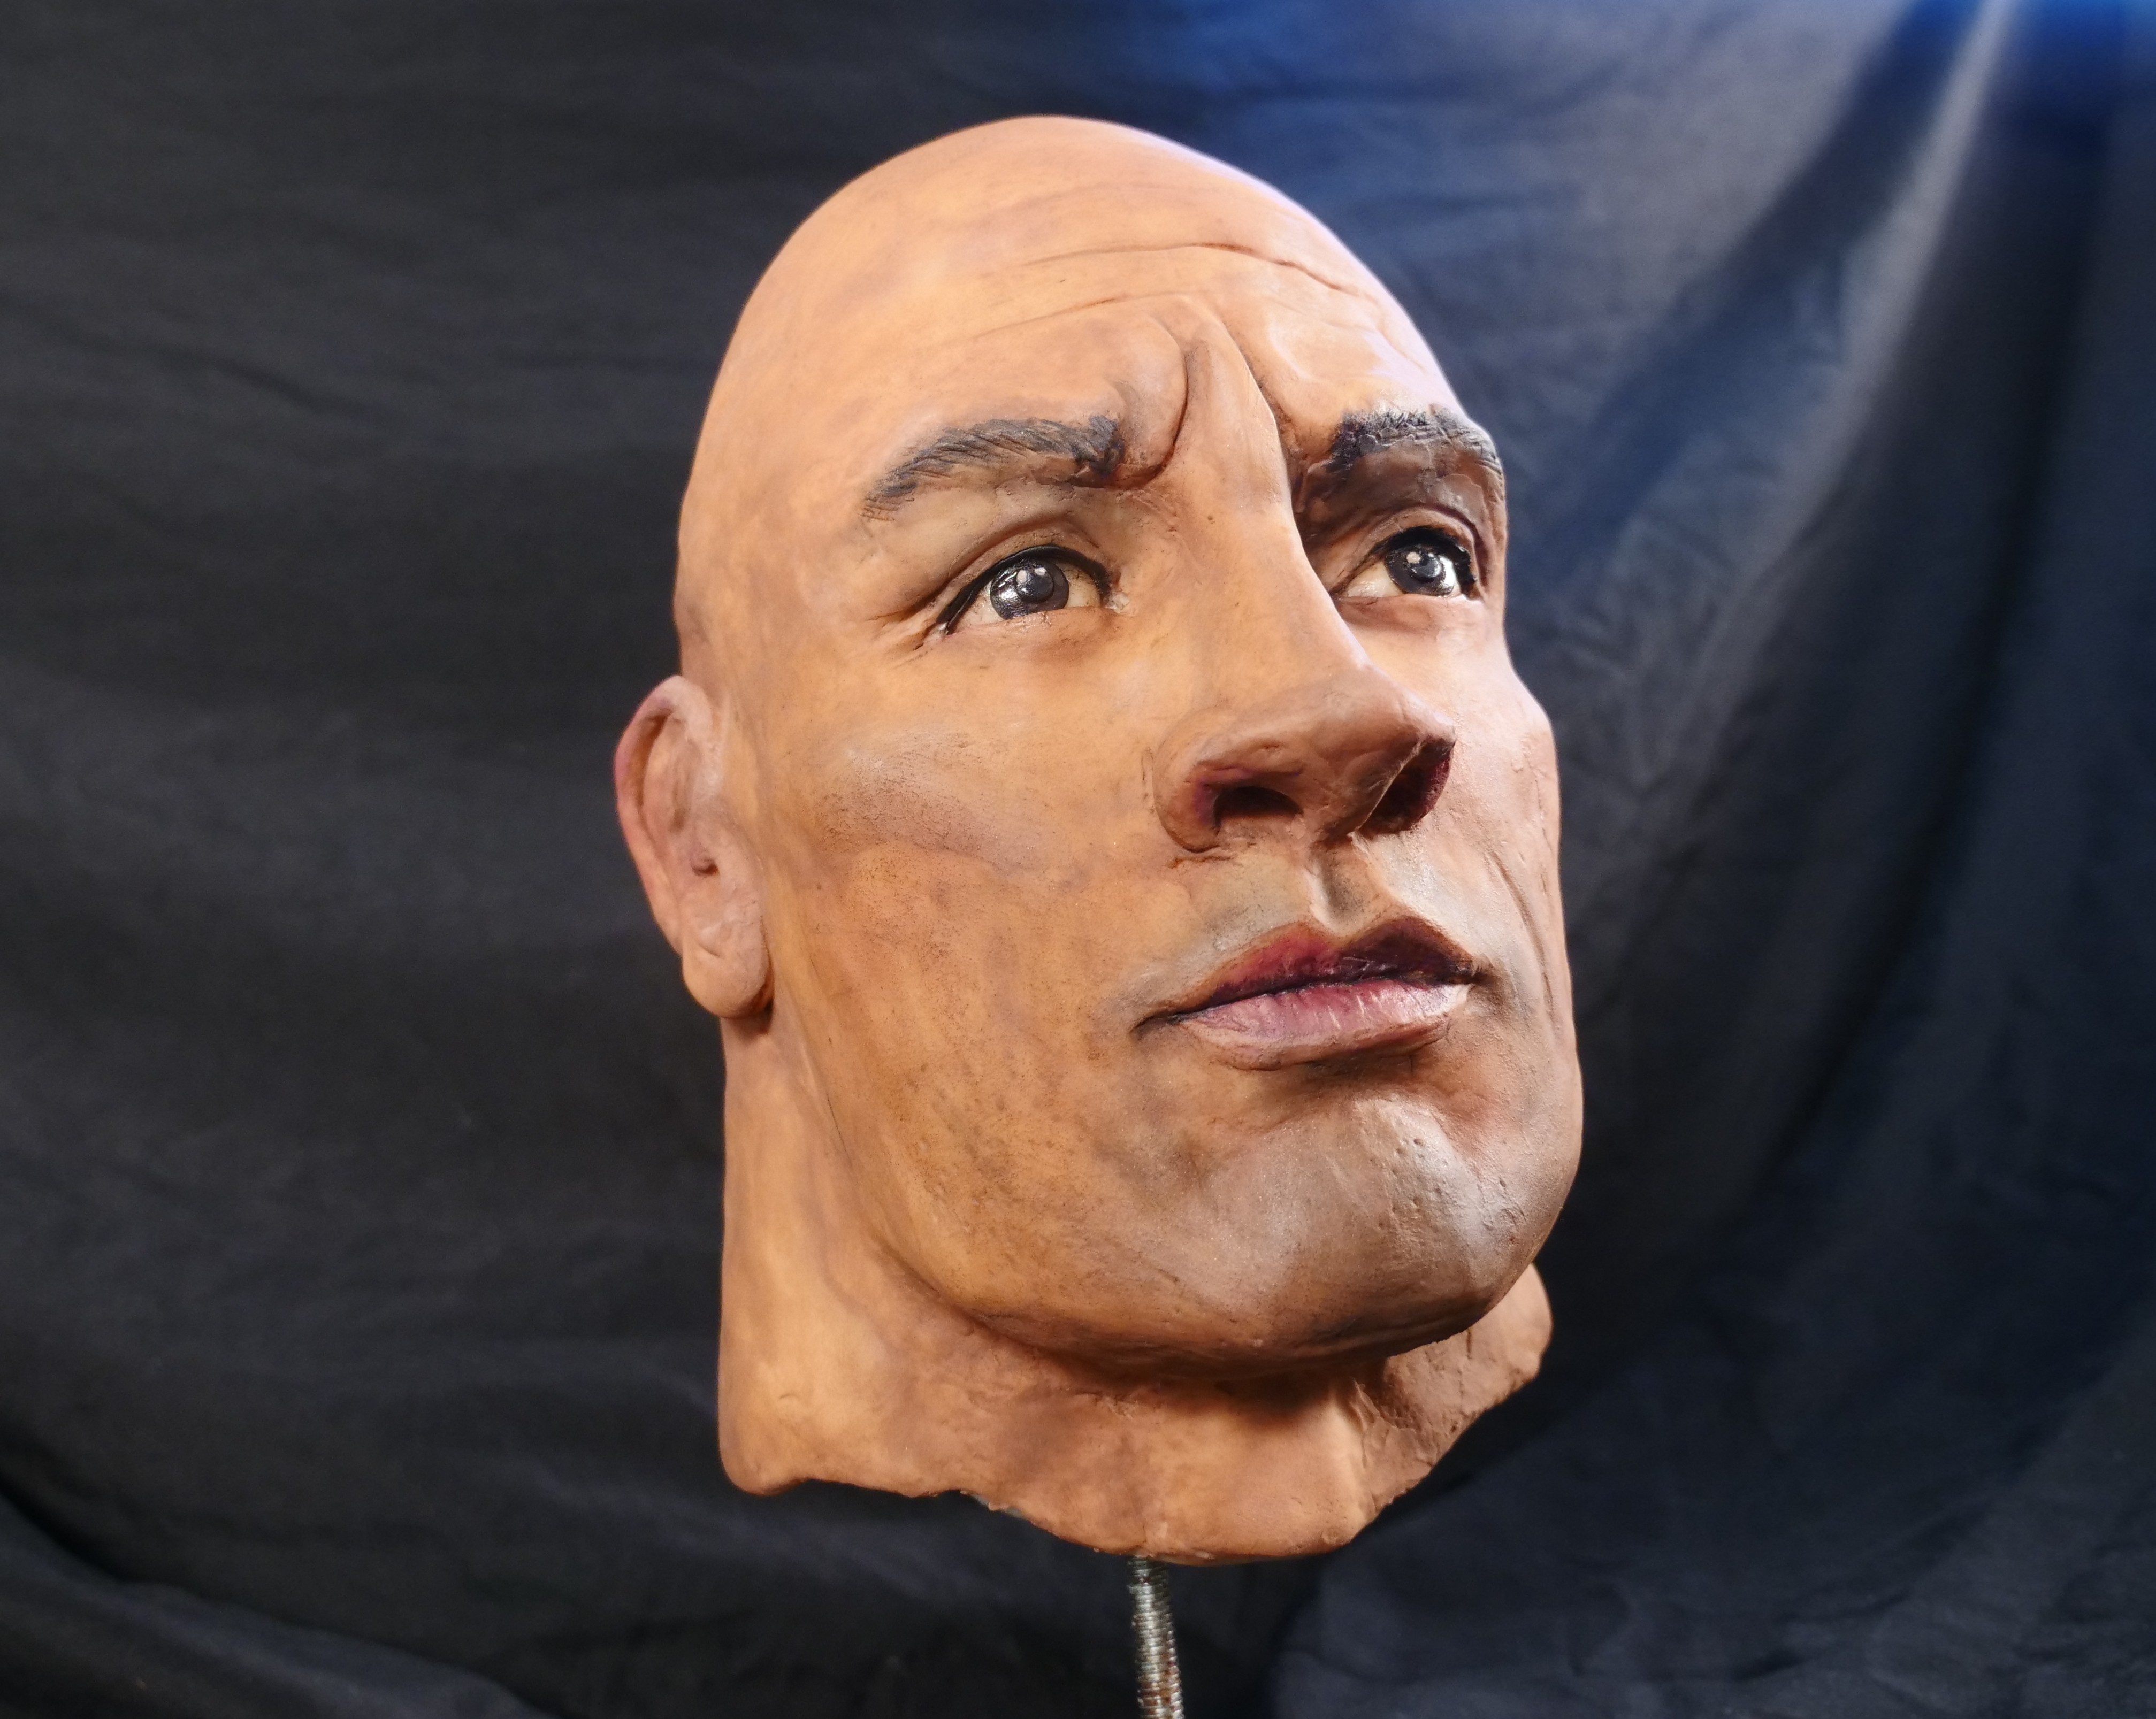
Sculpting a 3D head out of modelling chocolate
Sculpting a 3D head to look like a specific real person is hard. This is not something I’d recommend a beginner cake decorator should do, unless it is for fun or for a friend who won’t be insulted if they look a bit wonky. Making a cartoon or app characters is definitely much easier than a real person.
Apparently people who do this for a living have the person that they are sculpting do a sitting. This allows them to take measurements and photos of the same facial expression from different angles. Because Dwayne Johnson is in so many movies I thought I would just take a couple of pictures from the internet. Two hours later and I still could not find a side and front-on head shot of him with the same facial expression.
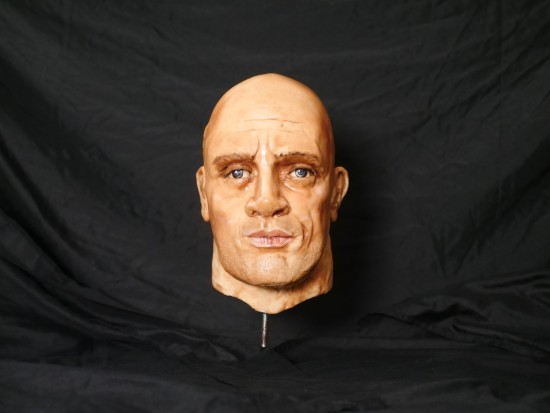
This is my first time ever sculpting a realistic life-sized 3D head out of any medium. I’ve never made one out of clay and I haven’t taken any classes. I thought I’d just dive in and give it a go. The result – well you judge for yourself – I think it might be a distant relative.
To make a 3d edible head this size for a cake you will need:
400g (14.11 ounces) chocolate
3 cups cereal such as rice bubbles or cheerios
3 kg (6.61 pounds) modelling chocolate. I used Saracino white modelling chocolate, it was great to work with. Having never used purchased modelling chocolate before I can not compare to other brands.
Threaded support rod and 2 nuts
A reasonably big wooden base board with a hole in it and feet. The feet allow room for the bottom nut to sit under the board. If the base board is too small it will not hold the weight of the head and it will tip. My base board was 45cm (17.72 inches) x 50cm (19.69 inches) x 1cm (0.39 inches) mdf
Powdered food colouring and brushes
cooking oil
Step 1
Print a picture of the person you want to make side on and front on in the size that you will be making the head.
Step 2
Make a cylinder of chocolate to go down the centre and insert the threaded rod to support the head while you sculpt.
Step 3.
Put the picture behind the head and add modelling chocolate to bulk it out to the shape of their head without a nose.
Step 4.
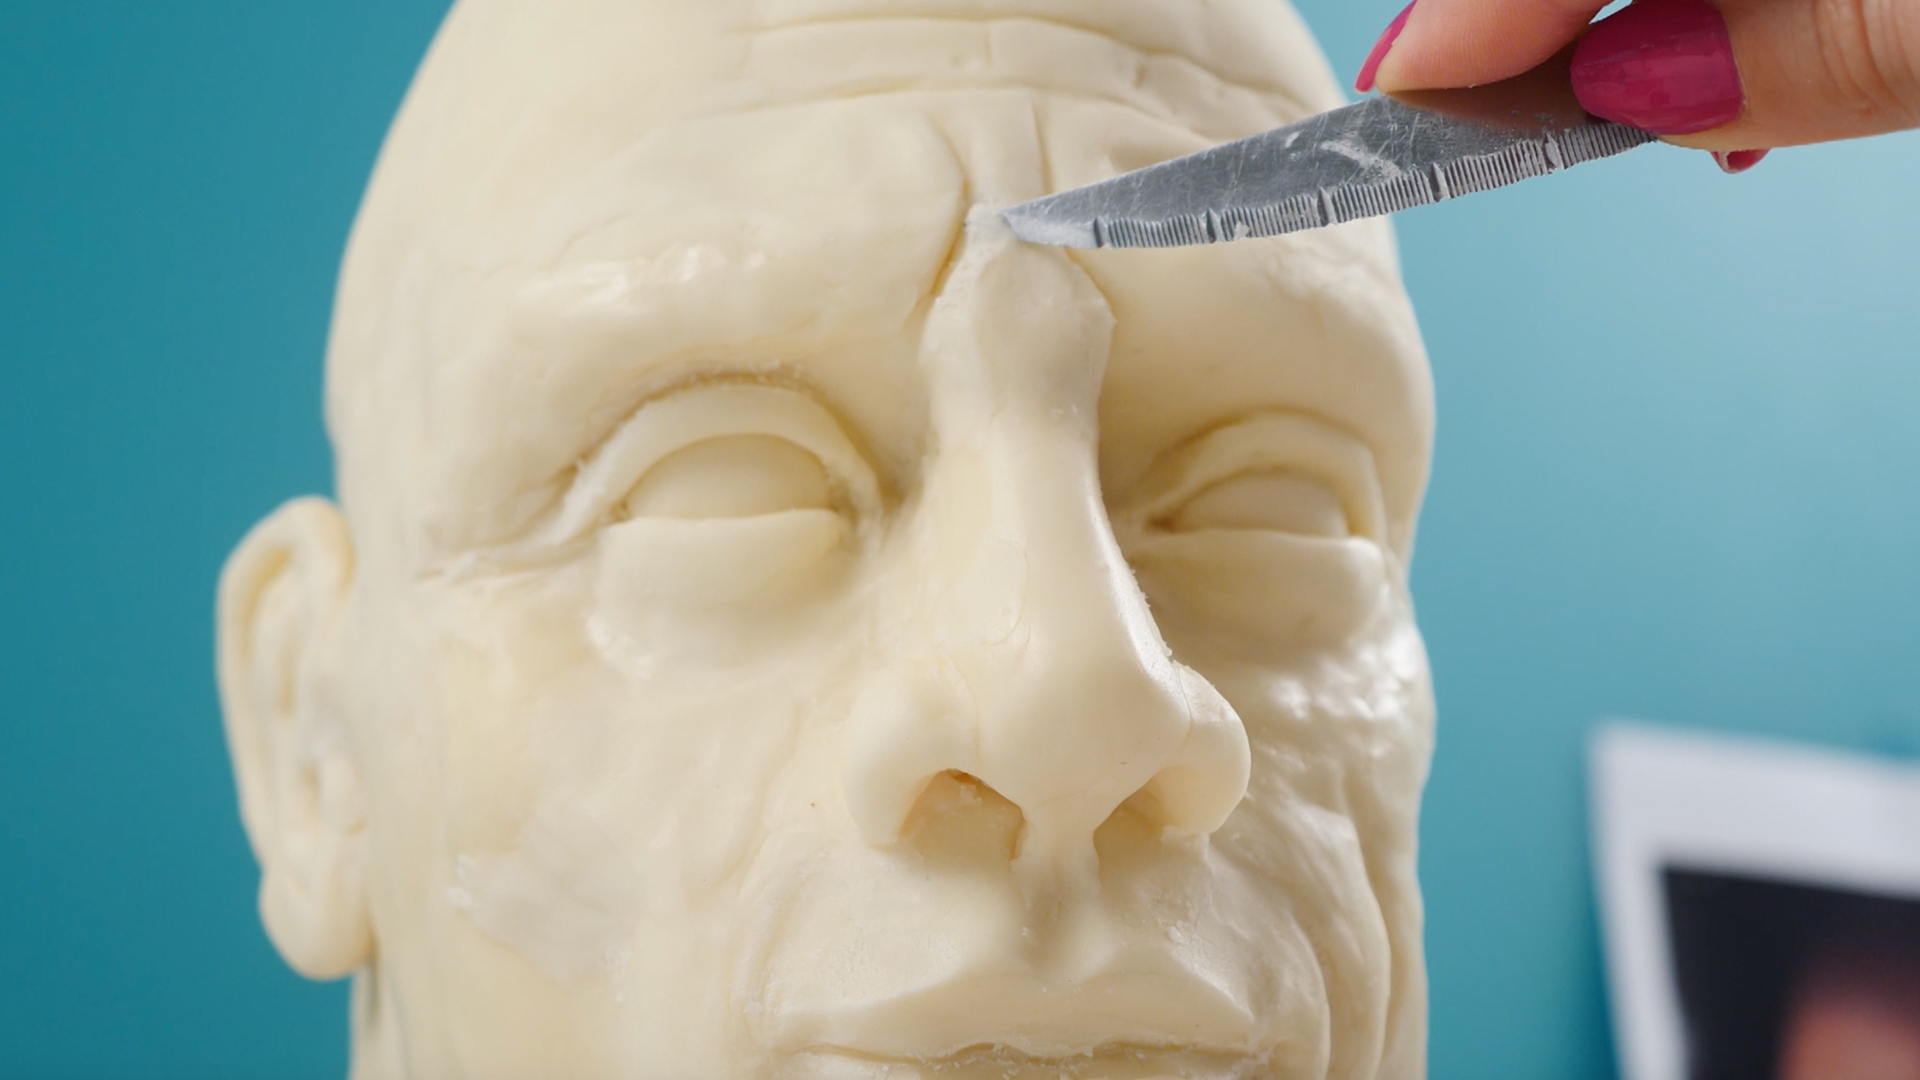
Start to sculpt. Look from the photo and back to the head and add or subtract modelling chocolate where it is needed. Add the nose and the ears. Allow at least 4 hours for this.
Step 5.
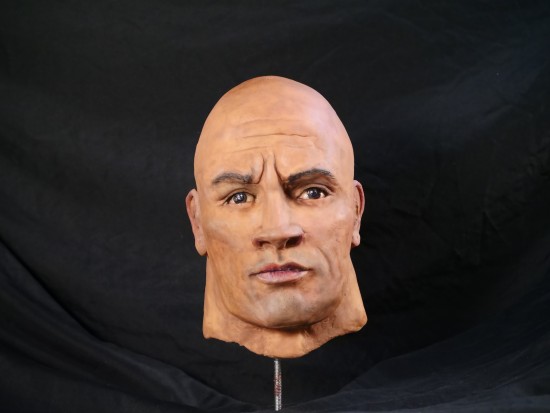
Move away from the head for at least a day. It is amazing how a break can help you see what is wrong with the shape of the facial features. It may also be that you are refreshed and ready to undo some of the work you did the day before. I should have done this, but I went ahead and coloured it – big mistake – but here is what it looked like.
Step 6.
Sculpt again this time making the small changes that make it look more like the person you are trying to make. To make it brilliant you should probably repeat steps 5 and 6 several times, but if you have other things you need to do like I did then skip to step 7.
Step 7.
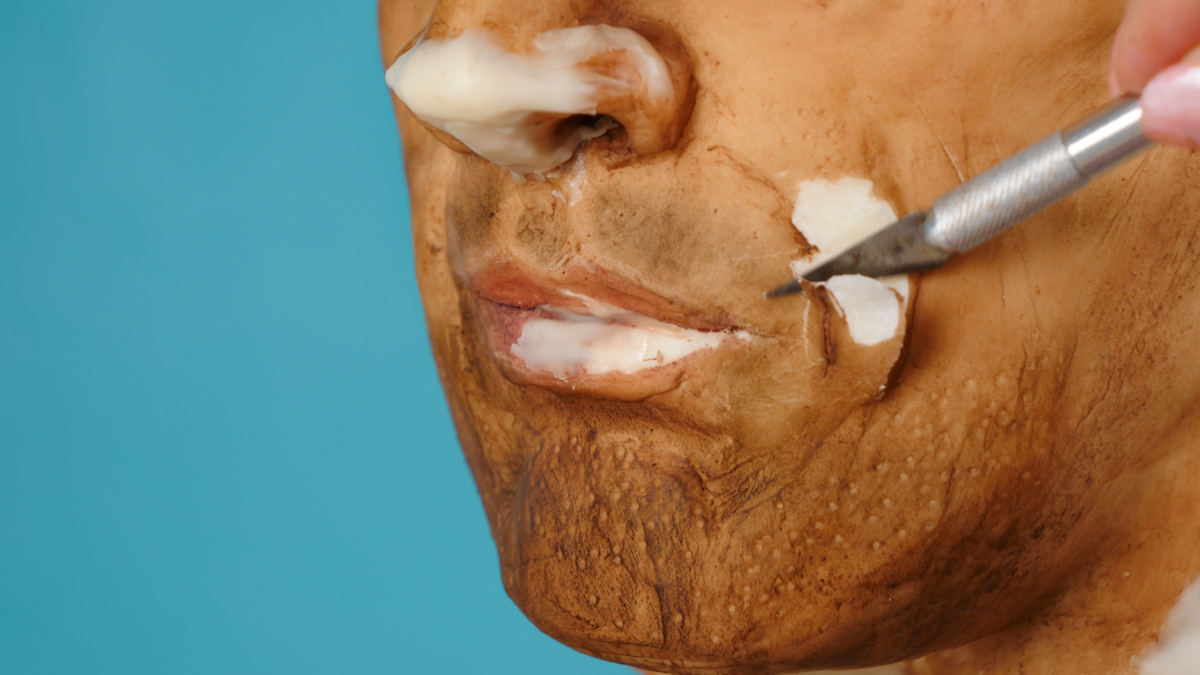
Dampen you fingers and gently rub and smooth the head adding little bits of modelling chocolate to fill any holes or join lines that shouldn’t be there. Then you must let this dry completely before the next step.
Step 7.
Spray the whole head with cooking oil then use powdered food colours mixed with oil to add colour to the head. See the video for two ways of doing this. I think the first way gave a more realistic skin look, but the second method was necessary to cover my mistakes. Even now you can see the uneven skin tones caused by colouring before the remodel.
My Cookbook
 Stores that sell my book listed by country:
http://bit.ly/ARcookbook
All recipe quantities in the book are in grams, ounces and cups.
Stores that sell my book listed by country:
http://bit.ly/ARcookbook
All recipe quantities in the book are in grams, ounces and cups.


 we respect your email privacy


That’s very good. The second one looks more like Dwayne Johnson
Absolutely amazing!
That was amazing! Thank you for sharing so much with us. I have used many of the ideas you have shared.
This was an amazing video and looked like it took a lot of effort. Thanks for uploading and can’t wait to see what comes out next Friday! Also just wondering whether you can carry on with your So Yummy series because I really enjoyed it. MAKE IT A GREAT WEEK!
Thanks JWall fortaking the time to comment!
Ann, what a wonderful process. Thank you for sharing it with us. The corrected version is much closer; from the nose down, it is perfect. Something about the eyes, I think. You are correct that they seem to be a little to deeply set.