3D My Little Pony Princess Twilight Sparkle Cake
To make this you will need:
1 1/2 quantities of my rich chocolate cake recipe
2 x my buttercream recipe in any flavor you like
Princess Twilight Sparkle Cake Template
1kg (2.2 pounds) Mauve Fondant (I used white and colored it using pink and purple gel food colours. I noticed that the colours faded a bit after the cake was made so make the colour more intense than you want).
20g (0.71 ounces) white fondant for eyes
100g (3.53 ounces) Pink fondant for hair and tail
100g (3.53 ounces) Navy Blue fondant for hair and tail
150g (5.29 ounces) Purple fondant for hair and tail
50g (1.76 ounces) Black fondant for eyes
Xylose powder (good for getting fondant details to set faster)
Non-food items:
5 stainless steel threaded support rods (see template for sizes) & 20 nuts
Today and head wooded support boards covered in foil (see template for size and shape)
Wooden base board, If you use a smaller round board like I did you will need to weight it to stop the cake tipping, alternatively you could use a larger heavier wooden board
4 little risers to put under the base board so you have room for the nuts under the board, this also makes it easier to move the board on the counter.
2 cake pop sticks for tail
Tools: Saw to cut your boards, drill to make holes for the rods, hacksaw to cut the threaded rods to length
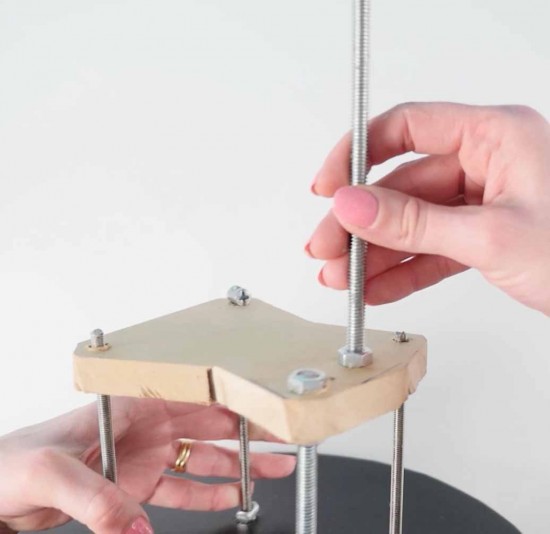
Step 1. Make the Cake supports by cutting the body and head boards to shape. Trim the threaded rods to length and drill holes for them into the base board, body and head board. Check that it all fits together well. Cover the wood in foil so it doesn’t come in contact with the cake. If you are using a metal other than stainless steel for the threaded rods you can also cover the rods in foil.
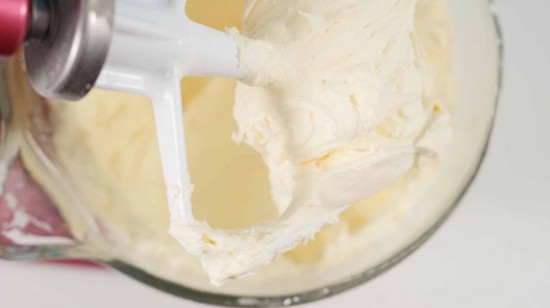
Step 2. Prepare your cake and frosting, you can do this the day before you plan on assembling the cake. Bake one and half times my rich chocolate cake in two trays 38.1cm (15 inches) x 25.4cm (10 inches). Make a double batch of buttercream in any flour you like.
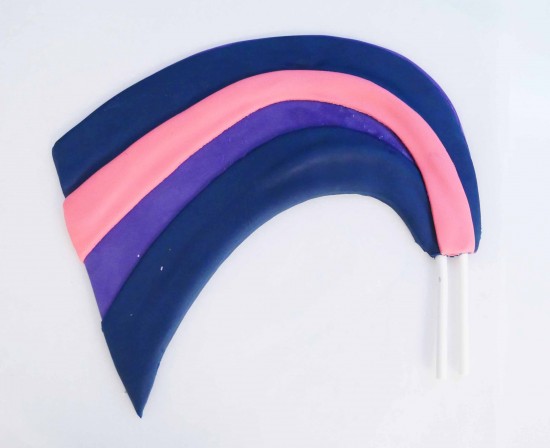
Step 3. Make the fondant details that need to dry out. The tail can be made any time up to a few weeks ahead. If you use tylose powder you can make it on the same day as you assemble the cake. Bend a couple of cake pop sticks to the curve of the tail. Using the template cut some purple fondant to to the size of the whole tail.
Rub a little water over the top and press the two cake pop sticks into place making sure you have some sticking out the end for poking into the cake. Add a strip of dark blue over the top to hide the cake pop stick. Another one at the bottom and then a strip of pink in the middle. Leave flat on some baking paper to dry out.
Step 4. Assemble and carve the cake. Cut around each of the cake template pieces, keep the template on each one so you know which layer goes first.
Add some buttercream to the top of the body support to make the cake stick, then add the first layer of cake placing it down over the stainless steel support onto the cake board.
Continue to stack up the layers, add a nut, the head board and another nut, tighten that really well then stack up the rest of the cake layers.
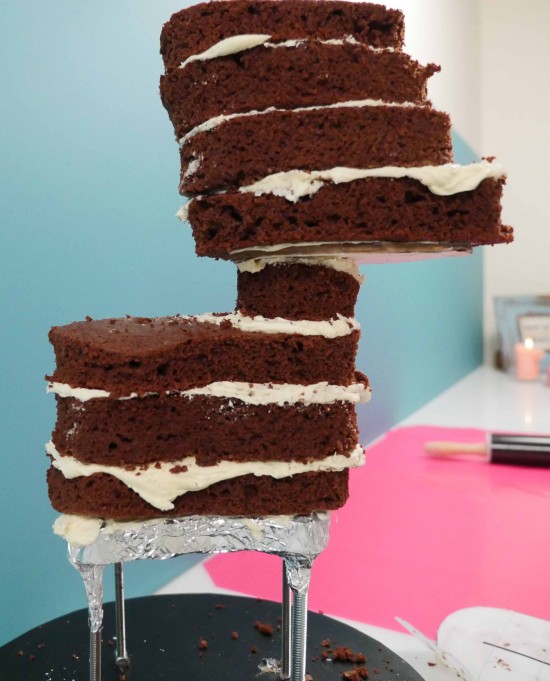
To carve the cake place the template in front of the cake and slice of any cake that is sticking out beyond the template.
Under the chin add some extra cake under-neath the cake board using an offcuts of cake. With the rest of the off cuts you can use them to make my easy cake scraps brownie recipe.
Shaving off a little bit at a time round out the edges of the cake so it doesn’t have any sharp corners.
Use the front head template to guide you with on the shape of the head from the front. Just take off tiny bits to round out the shape of the head so you don’t have any hard corners.
Step 5 Cover in buttercream. Cover the whole thing in buttercream then use some acetate to smooth the frosting around the curve of the pony.
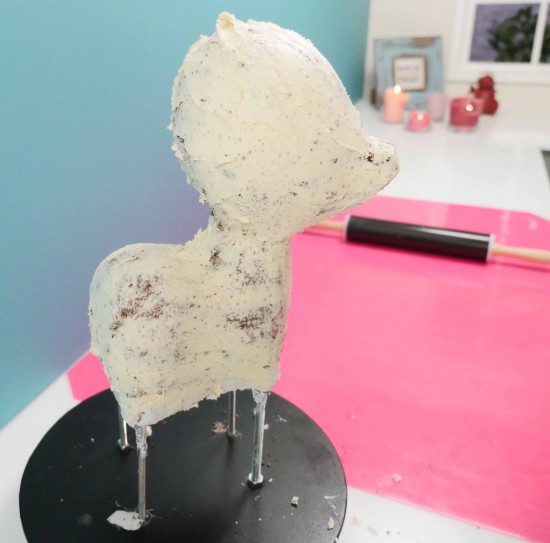
Step 6. Cover in Fondant. Roll out your fondant preferably on a silicone fondant mat if you have one. I use spray canola vegetable oil to stop the fondant sticking to the mat and the rolling pin.
Lift up your fondant and place it over the cake working quickly to smooth it around the head. Make and cover joins as shown in the video. Tuck the extra fondant underneath the body, if you use a little water it will help it stick to the other fondant. Make the nostrils and the indent for the mouth.
Step 7. Make the fondant details. The video will show you how to make the legs, ears, horn, wings, eyes, hair and stars. Add the tail into place and take some photos of your creation. Tip for a better cake photo – pay attention to what is in the background of your shot. You can upload a picture in the comments below, I love to see what you’ve made.
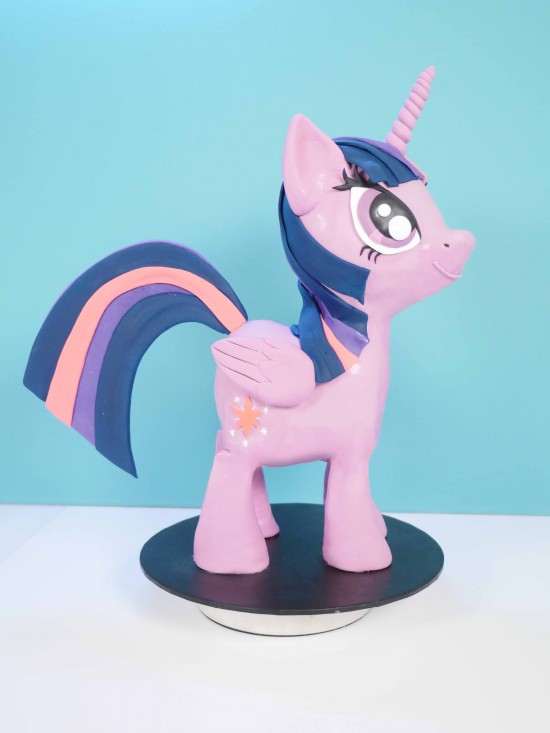
With thanks to My Little Pony The Movie for sponsoring this video.
My Cookbook
 Stores that sell my book listed by country:
http://bit.ly/ARcookbook
All recipe quantities in the book are in grams, ounces and cups.




 we respect your email privacy
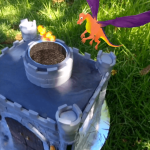

Would love to see a 3D dragon cake!
i have paid for the teddy cake and the my pony prince twilight sparkle cake im not sure if the templates are the right scale they look small to me especially the teddy bear.could you please tell me the hieght of the pony and bear are how many do people do they serve.
hi carol, just make sure that your printer is set to print at 100%. That way it will print out over several pages that you just tape together in the correct size. Have fun
Hi madam, am in Singapore and my daughter love pony and I want to make her 3d little pony cake from video you shown…I will buy the template from you but am not getting where I need to buy streaded rods, nuts and wood.. please help madam..if you send me structure I will pay for that too with template
Hi Gauri, Those items can generally be bought from a hardware store.
Another great creation Ann!! Perfect for bringing the characters to life for the kids (and delicious for the adults), thank you!
hi ann
i am new to your page can you perhaps make easy mini donuts and give cute ideas on sweet treats for one year old parties
Hi missL101. Ann allready has similar things on her site already. Check out these: https://www.howtocookthat.net/public_html/crazy-oil-fire-donuts-recipe/ https://www.howtocookthat.net/public_html/my-babies-first-birthday-the-party/ https://www.howtocookthat.net/public_html/best-of-the-web-1st-birthday-cakes-parties/
I was wondering about adapting this to be Rudolf the Red Node Reindeer for my Autistic Grandsons Class for their Christmas Party? I think the cake would be virtually the same Just the nose tail and antlers (instead of horn) would be altered what kind of support would I need for a pair of small Antlers if I made them out of RCT They would be fairly small and no bigger around then a finger or would I even need support?
Hi Sandra, for safety I would form your antlers on cake pop sticks or similar, that you could just slide into the cake. You could use rice crispies or make them out of fondant or chocolate
Wow! This is way beyond what I can do. I need to learn something from you. Weldone, your baking is really classy.
Here is my elephant
Ann, I would like to see a video on how to cut special designed cakes, Do you have one? I am never there when the recipient cuts special shaped cakes.
Thank you for this video, You gave me the confidence to undergo a couple of projects.
I made an elephant (mother’s love) hiding her baby behind her ears, asleep on her back. For a baby shower.
A very large long neck Brontosaurus, (Nessie) for a boys birthday. The boys pretended they were Tyrannosaurus Rex, the boys tore that cake apart. The mother of the BD boy said, “I have never seen kids have so much fun with a cake.”
Hi Cheryl, Thanks for the pics. I love your dinosaur and Elephant. Keep on baking!
Thanks for the tutorial …looks easy until I try it myself…
Amazing Ann!! There’s nothing you can’t bring to life in cake form!! ???