Despicable Me 2 3D Minion Cake Decorating Tutorial
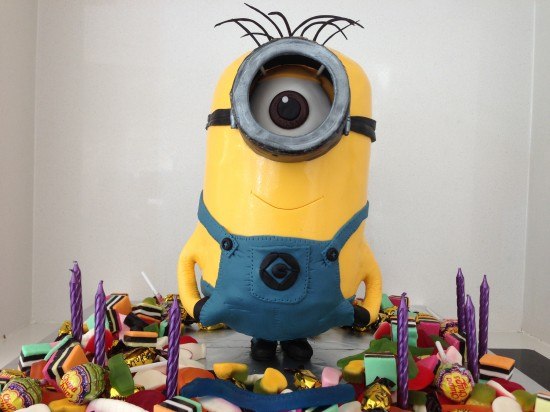 Despicable Me 2 is coming soon and my middle boy loves the cute minions, so this year he wanted a minion birthday cake. There have also been some requests from subscribers for a 3D upright cake tutorial and despicable me cake, so I filmed the making of his cake for you.
You will need:
round cake boards x 2 (one 8cm (3.15 inches) and one 15cm (5.91 inches) in diameter)
2 x 32cm (12.6 inches) cake spikes and four shorter cake spikes
base wooden or mdf cake board
Four lots of the Vanilla Cake Recipe 8 x 20cm (7.87 inches) tins, trimmed down to 16cm (6.3 inches) in diameter.
2 quantities of Buttercream Recipe in flavour of your choice
Fondant: 800g (28.22 ounces) yellow, 20g (0.71 ounces) brown, 50g (1.76 ounces) white fondant and 300g (10.58 ounces) blue (fondant recipe here, how to colour fondant here)
100g (3.53 ounces) Black fondant
Silver luster dust
Lollies and candles to go around the cake (optional)
This cake will make about 40 serves
Making a 3D Minion Cake
1. TEMPLATE: For any 3d cake that you want to make I recommend finding a picture of the character that you want to make, enlarge it to the size you want the finished cake to be and use that as your guide for sizing the cake and details. Here is the minion picture that I used, it is over two pages so you will need to cut and tape together Minion Template
2. DETAILS: Fondant details can be made up to a month in advance and left to dry out. Use the printout that you made of your character to guide you in the size. If you have never worked with fondant before watch the fondant basics video for help on colouring fondant.
To make the details for this minion cake see the video for instructions.
3. FRAME: You need a frame to support your cake.
Place your round cake boards onto the base board and drill two holes through both pieces of cardboard and through the base. Position the holes where you want the minions legs to be.
Drill two more holes one in front and the other behind the ones you’ve just done and add a short stick to each so that it sticks up above the board by 3cm (1.18 inches).
If your drill holes are not super tight then you can glue those in place. Put your smaller base board on top.
4. CAKES: Bake your cakes. For this cake I used 20cm (7.87 inches) round cake tins and trimmed them down to 16cm (6.3 inches). It took 8 cakes. 3D cakes take a deceptively large amount of cake.
5. FROSTING: You need frosting so the fondant has something to stick to. You can use ganache, I used buttercream.
6. ASSEMBLY: put your supports into place and your base cake board, cover it in a thin layer of buttercream and add your first layer of cake, add more buttercream and then your next layer of cake.
Insert a cake spike down to the cake board and mark off the level, cut two sticks to this same height so the cake is level. Poke them into the cake, add your next cake board and more buttercream. Add the next layer of cake, more buttercream REPEAT that until the cake is the height of your print out. (See the video for a demonstration).
7. CARVING: Use a finely serrated knife to cut away pieces of cake to make it the right shape. The top and the base of the minion is domed so it is fairly simple shape to carve.
8. CRUMB COAT: Cover the whole cake in a thin layer of buttercream, it doesn’t have to look pretty this is just to catch all the crumbs. Place it in the fridge and let it firm up.
9. FROSTING: Add another layer of buttercream over the top and use your pallette knife to smooth it off as best as you can. Then leave it for about 15 minutes and use some paper towel to smooth out any imperfections. Put back in the fridge.
10. DECORATE: See the video above for detailed instructions.
 |
 |
 |
by Ann Reardon How To Cook That
My Cookbook
 Stores that sell my book listed by country:
http://bit.ly/ARcookbook
All recipe quantities in the book are in grams, ounces and cups.
Stores that sell my book listed by country:
http://bit.ly/ARcookbook
All recipe quantities in the book are in grams, ounces and cups.


I made your minion cake for my 17th birthday cause i think theyre so cute, your instructions helped so much!! it turned out pretty well for my first attempt at a cake this complicated i think. i made some cake pops to go along with it, and inside each cake was a rainbow cake 🙂 everyone loved it..! it took 16 hours and there where a few problems, but it was well worth it 🙂 Thank you.!!!!
Awesome Job Xenia thanks for taking the time to share the pic with us 😀
hi ann,
I planned to give it a try and make the minion cake but what kind of ‘base’ do you use to drill holes through and place sticks in? I am afraid it could break if I chose anything that seems right but turns out to be not at all.
Please answer! I really need to know what kind of base you used!
Thanks!
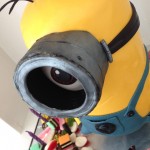
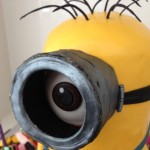
and how did you actually assembly the two parts of the goggle? I can’t imagine that it won’t fall apart without glue or anything to fix it together really tight
Hi nora, I was thinking of filling the goggle with melted isomalt but changed my n=mind because it wasn’t clear enough to see the eye, but that is what i used to fix it together. You could use melted chocolate or a paste of fondant with a tiny bit of water then leave it to dry.
Hi Nora, the base if a piece of mdf from the hardware store any wood will work
Hey Ann,
LOVE the cake! Wanna make it for my mum’s birthday but I have NO idea how you cake into the thing and eat it. Please tell me soon! Xxxx
Stay amazing x
Hi Kerryn, imagine that it is a normal round cake, cut through 2 layers at the top and take out a slice, and repeat until you have finished a layer and then cut down another 2 layers…
Hey Ann, I love all your recipes and I’m hoping to try one out soon. But as I was looking through your buttercream recipes I noticed you said to use icing sugar, what exactly is icing sugar? Is it just powdered sugar, or something else?
hi isabella, yes we call it icing sugar here – which is really finely ground sugar plus a tiny bit of cornstarch to stop it clumping
I would like to make this cake however, I am undecided due to time and financial restrictions. Can someone please tell me approximately how much this costs to make and the time needed?
Thanks
I spent $80, it took me 2 hours to make the small parts, 2.5 hours to cook the six cakes and 7 hours to stack and decorate = total of say 12 hours..good luck with yours you should totally do it, it is an awesome cake, the kids went wild! Thanks again Ann – love your work!
Hi Ann
Greeting from Indonesia
wondering how did u make your blue jeans fondant. what color do u use?
is it wilton gel coloring? since have never had a blue jeans coloring. or do u mix some color to have it?
looking forward to your good news
*hugs
hi angelia I used some blue and some black gel coloring
Thanks for sharing this great recipe, what for many people is this cake?
greetings from mexico!!!!!
Sorry I mean how many people eat with this cake?
Thanks! 🙂
Hi meretsolell that depends on you slice sizes. Think of it as 4 round double layered cakes and if you would cut 8 slices from each then you’d have 32 serves
Sorry to bother you again I just want to get this perfect
Hi Ann, thank you for such an amazing video on how to make a minion cake. I would like to make this for my sons bday, but when watching the video I am a little confused because it doesn’t look like you stacked 8 tiers of cake. Could you confirm if you did stack 8 tiers of cake to make this minion?? Please and thank you!
Hi Sylvana yes I used 8 cakes to get the height, I try and keep the videos concise so if adding 8 layers in the exact same way i will show putting some of them on so you know what to do and then move on the the next step. Like in the car video I showed making one wheel and didn’t show making the other three.
i am going to attempt to make this for my son’s first birthday. I’ve never even baked before. I am getting anxious as the day is getting closer! just wondering.. where can i get these cake spikes that you’re talking about?
hi kelly cake decorating stores, but they are basically just thin wood so hardware store would have it too (sterilize in boiling water and allow to dry)
HI
i have just seen your work and i think its amazing. I love baking and one day hope i can be as good as you. I saw your minion cake and loved it and thought this would be great for my birthday in November. I have never used fondant before so what would u recommend for practice? Also for the cake to be fresh how long would u start the cake before the actual party as well as the fondant as u said in the video leave to harden but how long does that take? Basically as a whole including waiting time, how long does it take to make?
Thanks so much love your work
Sabrina
hi sabrina you can make the details up to a month ahead but at least 5 days ahead to harden. You can practice with the fondant, if you are not happy with it squash it up and make again just like you would when making something out of playdoh
Hi Ann,
I just want to thank you for your amazing video tutorials. I’ve been watching your videos and reading your blogs for few months now and I must say they are really inspiring. So I finally gave in and tried one of my favorite cakes you made… Minion cake! It’s quite a challenge since its my first time making a 3d cake and the birthday girl particularly requested for the purple minion. So here it is!! Thanks again I wouldn’t be able to pull this off without your help. More power!!
so good, and thank you everyone has been asking for a purple minion now they can see one
this looks great! did you use dowels in this cake to help support it? i cant quite tell from the picture?
Hi jenn, if you click play on the video it will show you all the construction details for the cake 😀
Hi Ann, i am making this cake for my nieces birthday and already have all the ingredients but instead of pain flour i bought self rising flour for thevanilla cake recipe. Can i use that instead? And if so will i not be using the baking powder and salt the recipe calls for because the self rising flour already has some? Thank you for your help! I love all your videos!
Liz from California 🙂
Hi liz yes that should be fine
Thanks for this video! That is so gnarly! My son’s 5th birthday is on august 1, and I am planning to have a “minion-theme party” for his special day since we really love minions! I will definitely try my best to make this cake. But I have a few questions before I make this.
-I couldn’t find silver luster dust here in my country, so what will you recommend to substitute for that?
-If I bake the cakes 5 days in advance, should I freeze them? (sorry I’m new in baking) that would make them so hard, Do I need to put on something to make the cakes soft again, if I put them out the fridge? like your simple syrup recipe?
I hope you can answer my questions.. Thanks a lot ann!!
Hi biba, yes if you make the cakes ahead then you can wrap in plastic wrap and freeze, once defrosted spray on some simple syrup.
If you can not get silver luster dust then you could use grey fondant instead.
All the best
thanks! 🙂
Hi Ann! Here it is! My version of minion cake. Not as good as yours though. This is my very first time working with fondant. Thank you very much! My son loved it
THat is so good biba, I have included it my 100th youtube video for the world to see 😀 https://www.howtocookthat.net/public_html/youtube-cake/
Hi Ann, are you using Royal Blue for the minion overalls?
Thank you for your detailed video on the minion cake! I had never worked with fondant before and I’d never made a layered cake either. But, with my iPad on the counter, and my blown up template on the fridge, I followed your directions step by step, and look what I did!! I couldn’t have done it without your video! I was too chicken (maybe lazy?) to trim the cakes to the smaller size, so this Minion was made with 5 boxed cake mixes in 8 x 3 inch round pans. This caused the cake to be too heavy for the small cardboard base, so I had to add extra supports at the bottom and I eventually needed additional supports for the heavy arms, too. But it was a great big hit for my daughter’s 9th birthday! Thank you so much, Ann!! 🙂
Wow, that is impressive, If you have never worked with fondant before you definitely should use it again because you have talent well done.
what blue color you use ?thanks for sharing …. love it
I am going to make this for my husband’s birthday 🙂
Thanks Ann, you are an inspiration.
Here is my version of your minion.
In the end I used a plastic cylinder to wrap the goggle around. I could not get it to stay firm on the balg paper when wrapped around the bottle.
Thanks for your video and guidance.. Without it I would not have ever tried this cake
that is awesome, you did a wonderful job. Thanks for sharing the pic with us, I love the sparkle!
🙂
Ann,
Can you add flavor to the fondant or will that mess with the texture.
Hi Vanessa, yes you can, obviously the more liquid you add the stickier the fondant will be but you don’t need much of most essences to get a good flavor. Some brands now sell flavours too.
Hi, I stumbled across your YouTube tutorial of this cake and can I just say that you are extremely talented! I would really enjoy having a go at making this for my boyfriends birthday later this year! I live in the UK and I’m having trouble finding cake spikes – can you recommend anywhere in the UK/online? Thanks x
hi sophie try this store…
http://www.cakecraftshop.co.uk/shop/7/235/
Thanks! 🙂
WOW!! That’s fantastic, I have been looking for a perfect cake for my twin daughters 3rd birthday and have found it here! I am going to give this a try and hopefully it will resemble what you have done! Thanks for posting this along with the video and the template – wish me luck 🙂 x
All the best Jemma, make sure you take a photo and upload it here when you’re done